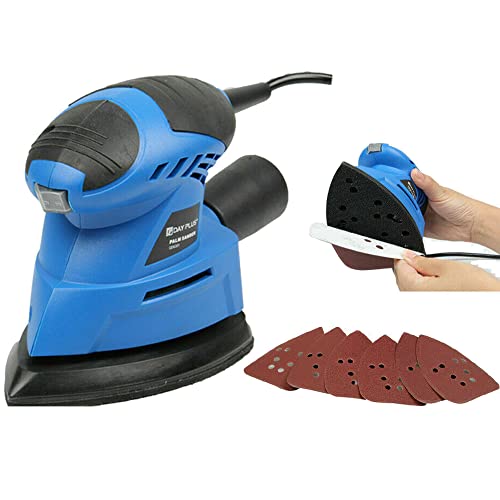
How To Make A Rolling Pin Sander


Are you tired of spending hours sanding down your woodworking projects by hand? Do you dream of finding an easier way to achieve a smooth, flawless finish? Look no further – a rolling pin sander might just be the solution you’ve been searching for!
A rolling pin sander is a simple yet highly effective tool that can save you time and effort in your woodworking endeavors. With just a few materials and some basic woodworking skills, you can create your own rolling pin sander and take your projects to the next level.
The beauty of a rolling pin sander lies in its versatility. Whether you’re working with a small piece of wood or tackling a larger project, this tool can easily adapt to your needs. The rolling pin’s cylindrical shape allows for even pressure distribution and smooth sanding, giving your workpieces a professional finish.

So, how can you make your own rolling pin sander? The process is surprisingly simple. First, you’ll need a wooden rolling pin without handles – a vintage or thrifted option is perfect for this project. Then, you’ll need to attach sandpaper to the pin using adhesive. Choose a sandpaper grit that suits your project – finer grits for a smooth finish and coarser grits for more aggressive sanding.
DIY Rolling Pin Sander: Step-by-Step Guide
If you’re looking for an affordable and effective way to sand your woodworking projects, making a rolling pin sander can be a great solution. With just a few simple materials and some basic tools, you can create a versatile sanding tool that will make your woodworking tasks much easier. Follow this step-by-step guide to learn how to make your own rolling pin sander.
Materials You’ll Need:
- A wooden rolling pin
- Sandpaper sheets (medium and fine grit)
- A drill with a drill bit
- Craft foam
- Super glue or adhesive
- A ruler
- A pencil
Step 1: Prepare the Rolling Pin
Start by removing the handles from the rolling pin using a saw or a chisel. Make sure to sand the exposed ends smooth.
Step 2: Measure and Cut the Sandpaper
Measure the length and diameter of the rolling pin, then cut the sandpaper sheets to fit these dimensions. You’ll need two pieces of sandpaper for each grit (medium and fine).
Step 3: Attach the Sandpaper
Apply a thin layer of adhesive or super glue to the outside surface of the rolling pin. Carefully place the sandpaper onto the glue, making sure it is centered and aligned with the edges. Repeat this step for the other piece of sandpaper.
Step 4: Secure the Sandpaper
Using craft foam, cut two thin strips that are slightly longer than the width of the sandpaper. Apply adhesive to one side of each strip and attach them to the ends of the rolling pin, covering the sandpaper edges. Press firmly to ensure a secure bond.
Step 5: Let the Adhesive Dry
Allow the adhesive to dry completely according to the manufacturer’s instructions. This usually takes a few hours.
Step 6: Test and Use
Your DIY rolling pin sander is now ready to use! Simply hold the rolling pin by the ends and roll it back and forth across your workpiece. The sandpaper will provide a smooth and even sanding surface, making your woodworking tasks much easier and more efficient.
Remember to replace the sandpaper when it becomes worn or damaged for optimal results.
By making your own rolling pin sander, you can save money and have a versatile tool that will help you achieve professional woodworking results. Enjoy your sanding projects with this DIY creation!
Gather Materials and Tools
Before you start making your rolling pin sander, it’s important to gather all the necessary materials and tools. Here is a list of what you will need:
Materials:
- Wooden rolling pin – preferably with a removable handle
- Sandpaper – various grits (e.g., 80, 120, 220)
- Wood glue
- Clear finish or varnish
Tools:
- Drill
- Drill bits – various sizes
- Screwdriver
- Sandpaper block or sanding sponge
- Saw
- Clamps
- Paintbrush
Make sure you have all the materials and tools ready before you begin the project. You can find most of these items at your local hardware store or online. Additionally, consider wearing safety gear, such as safety goggles and gloves, while working with power tools and adhesives.
Build the Rolling Pin Sander
Building your own rolling pin sander is a fun and rewarding project that will save you money in the long run. Here are the steps to build your own rolling pin sander:
Materials:
- Wooden rolling pin
- Sandpaper in different grits
- Epoxy glue
- Wood glue
- Clamps
Instructions:
- Remove the handles from the rolling pin if it has any. This will allow you to attach the sandpaper directly to the surface of the rolling pin.
- Measure the length of the rolling pin. Cut the sandpaper into strips that are slightly longer than the length of the rolling pin.
- Apply epoxy glue to one side of the rolling pin. Attach one end of the sandpaper strip to the glued side of the rolling pin. Press it firmly and let it dry according to the glue manufacturer’s instructions.
- Once the glue is dry, wrap the sandpaper strip around the rolling pin tightly. Use clamps to hold it in place until the glue sets completely.
- Repeat steps 3 and 4 for each sandpaper strip with different grits that you want to use.
- After all the sandpaper strips are attached, apply a coat of wood glue over the sandpaper to seal it and prevent it from moving while in use.
- Let the wood glue dry completely before using your rolling pin sander.
Now you have your homemade rolling pin sander ready to use! Simply roll it over your workpiece to sand and smooth the surface. Remember to change the sandpaper when it becomes worn out to ensure optimal sanding results.
With a little bit of time and effort, you can create a useful tool for all your sanding needs. Enjoy the satisfaction of building your own rolling pin sander!

Sanding Techniques and Tips
Sanding is an important step in any woodworking project as it helps to create a smooth and polished finish. Here are some techniques and tips to help you achieve great results with your rolling pin sander:
- Start with the right grit: Begin sanding with a coarse grit sandpaper to remove any roughness or imperfections. As you progress, switch to finer grits to achieve a smoother surface.
- Use even pressure: Apply even pressure while sanding to ensure that you remove the same amount of material from all areas. This will help to avoid creating uneven spots or dents in your workpiece.
- Sand in the direction of the grain: Work with the grain of the wood to prevent surface scratches and achieve a more professional-looking finish.
- Change sandpaper regularly: As sandpaper wears down, it becomes less effective. Change your sandpaper frequently to maintain optimal sanding performance.
- Keep the sander moving: To avoid overheating the wood or creating uneven sanding marks, always keep the rolling pin sander moving while in use.
- Check your progress regularly: Stop sanding periodically to inspect your workpiece. This will help you identify any areas that need further sanding or touch-ups.
- Round the edges: Use your rolling pin sander to gently round the edges of your workpiece for a more finished and polished look.
- Remove all dust: After sanding, make sure to remove all dust and debris from your workpiece before applying any finishes. This can be done using a brush or vacuum.
By following these sanding techniques and tips, you can achieve a smooth and professional-looking finish with your rolling pin sander. Happy woodworking!
Questions and answers
What materials do I need to make a rolling pin sander?
You will need a rolling pin, sandpaper, double-sided tape, and a saw.
Can I use any type of rolling pin to make a rolling pin sander?
Yes, you can use any type of rolling pin as long as it has a smooth surface.


Meet Harrison Clayton, a distinguished author and home remodeling enthusiast whose expertise in the realm of renovation is second to none. With a passion for transforming houses into inviting homes, Harrison's writing at https://hutsrenovations.co.uk/ brings a breath of fresh inspiration to the world of home improvement. Whether you're looking to revamp a small corner of your abode or embark on a complete home transformation, Harrison's articles provide the essential expertise and creative flair to turn your visions into reality. So, dive into the captivating world of home remodeling with Harrison Clayton and unlock the full potential of your living space with every word he writes.